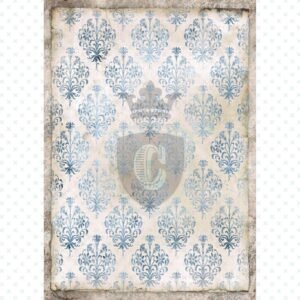
Waterslide Transfers
Waterslide Transfers or Decals can be an easy way of making your projects look amazing. They are images that can be applied to wood, furniture, glass, ceramics, and more. If you want any custom designs or want us to print an image for you on a Waterslide Transfer please do not hesitate to contact us.
Please Note: Custom designs will be quoted individually. Images sent to us for printing need to comply with copyright laws. We strive to not have any copyright images in our collection, we do our best to do research on the images we choose or procure for our collection. If you have any problems with an image in our collection please let us know and we will help you as soon as possible.
What are Waterslide Transfers:
Waterslide Transfers are thin sheets of film that can transfer an image onto a surface. You can compare them to stickers only thinner and easier to blend into your project. They come with clear or white backgrounds, and some images can be cut out to give the best finish. Clear Background Waterslide Transfers will show the background of the item you apply it in the white spaces of the image. Example: If you apply a Clear Waterslide to a blue background the white spaces on the Waterslide will show as blue. These are great to have a blended effect and are able to be used in the reversed method of application. White Background Waterslide Transfers will look exactly like the image you see on the Waterslide. It will block out any background from the item you apply it to. Any white parts on the waterslide will stay white. Example: If you apply blue flowers to dark wood, you will not see the wood through the image. This is great for darker items and is recommended to have cut-out to prevent a border effect. White Waterslides are not compatible with the reverse method of application.
How to apply Waterslide Transfers:
WHAT YOU NEED
- Scissors if cutting out your own.
- Spray bottle or bowl (large enough to place your transfer in) of water.
- Paper towel or soft cloth.
- Small soft brush or sponge.
- Clear Spray Sealer.
Take your time reading these waterslide decal instructions thoroughly. Reading these will give you the best results when applying.
WARNING! Waterslide Transfers are extremely delicate and require care when using. If not applied properly the transfers may tear or fold during application. It is suggested that you do a small trial before you apply your purchased product. Smaller transfers are easier to work with than larger ones.
Your application surface should be as smooth as possible. Make sure you have cleaned the surface well, ensuring that it is free of any oils, particles, and dust. It is recommended that you first spray a coat of sealer over the surface and allow it to dry. This will ensure that the surface is smooth and any pores are filled. Remove the transfer sheet from the packaging and read the enclosed instructions well. If you have any doubts or this is the first time working with waterslides practice with a smaller piece first. This can be a small transfer or off-cuts from your current transfer. Cut out your transfer as close to the image as possible. (You can also get your transfers pre-cut from us if the image does not have a solid background.) White areas left uncut will show a little film or edge on your project. When using white background transfers all-white areas will stay white when applying your transfer. Store the remainder of the transfer sheet in the supplied packaging away from direct sunlight. This will also prevent oils and moisture from coming in contact with the sheet. Fill a spray bottle with clean room temperature water. Place the cut-out transfer on a damp paper towel and spray decal backing until it is completely soaked. Flip decal so that the print side is facing up and spray with water. The transfer film will start to separate from the backing when applying pressure between your two fingers. This could take between 5-15 seconds. Do not force the decal from the background or it will tear. Once the decal has started to separate you may proceed to the next step. You can also place the cut-out transfer in a bowl of clean, room temperature water for 5-15 seconds, however, you may have less control when doing this. Carefully place decal and backing on the application surface where you want the transfer to be placed. If you ordered a cut out decal we recommend the picture to be placed face-down to make tearing minimal. (This is called the reverse application method) You may moisten the application surface with water first to assist you in transfer placement after application. Carefully slide the backing paper out from underneath the transfer film leaving the film on the application surface. Or use a wet brush to moisten the backing paper of your cut-out transfer and holding the film down with your brush while removing the backing. You may use a small soft brush or your fingers to assist you in holding the film in place. Smooth out the transfer using a damp paper towel or sponge; the actual waterslide backing works best for this as it is slightly slippery and won’t catch on your waterslide. Using a paper towel or sponge, carefully dab away excess water. Then let the transfer dry. Before spraying the sealer that the decal is 100% dry both on top and underneath. You may speed up this process by using a hairdryer, do not use a heat gun as it will melt. To protect the waterslide transfer after application, spray the dry transfer with sealer. Apply 2-3 very thin coats over the transfer and the application surface; allowing it to dry each time. After you have sealed the surface with the thin coats you may apply a heavier coat to protect the transfer fully. The application of waterslide transfers requires a delicate touch and concentration. If this is your first time applying a waterslide transfer, please try some samples first.
We cannot be responsible for replacing transfers that have been damaged during application.
Our Waterslide Transfers are procured/designed by 3D-ink.
If you have any trouble or questions, please contact us. You can also follow all our news and updates on our Facebook Page.


Reviews
There are no reviews yet.